
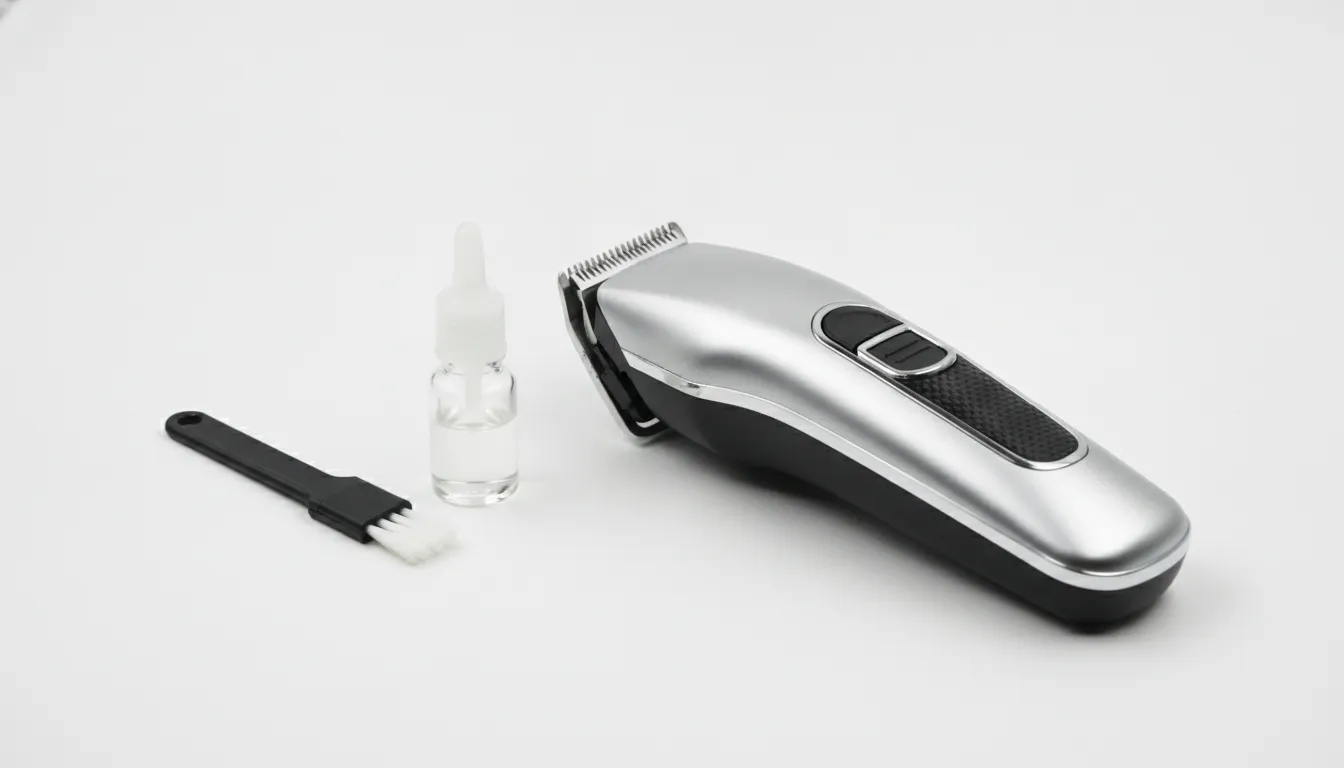
A clipper motor rarely fails without warning. Packed hair, residue, poor lubrication, and heat can make a reliable tool pull through a cut, lose power, or leave you reaching for a backup. The safe response is not to flood the housing or dismantle electrical components between clients. Start with controlled exterior cleaning, then recognize when the problem has moved beyond routine maintenance. Stop by The Barber Company in Las Vegas for professional clipper motor repair when cleaning no longer restores performance.
Learning how to clean a clipper motor safely means clearing hair and debris from accessible areas. Cleaning the blades separately, and using the correct clipper oil after they are dry. Never introduce water into the motor housing. If the clipper grinds, overheats, smells burnt, or loses power, stop cleaning and request a professional diagnosis.
Use this guide alongside The Barber Company’s complete guide to barber clipper care and maintenance to protect your equipment without turning a maintenance task into an electrical repair. The first step is separating what a barber can safely handle at the station from what belongs on a technician’s bench.
How Do You Clean a Clipper Motor Yourself? What Is Safe to Do
Learning how to clean clipper motor components safely means separating routine surface care from electrical repair. At home, you can remove hair from the housing, vents, blade assembly, and accessible exterior surfaces. Keep liquids, tools, and compressed air away from the motor interior, where a technician should handle diagnosis and repair.
Most professional clippers use a sealed motor assembly rather than an exposed mechanism that should be scrubbed or rinsed. Rotary motors, pivot motors, and magnetic motors operate differently, but the practical maintenance rule is the same: clean the parts designed for access. And do not treat the motor housing like a removable blade.
What you can safely clean at home
Begin with the clipper unplugged or switched off, and remove the blade assembly according to the manufacturer’s instructions. Brush loose hair from the blade, blade hinge area, housing seams, and ventilation openings. A dry, fine brush is useful for reachable debris. Wipe the exterior with a lightly damp cloth, keeping moisture away from openings, switches, and the power connection.
The blade assembly is the working area that collects the most visible hair and product residue. Clean it separately, let it dry fully, and reinstall it only when there is no loose moisture. Vents also deserve attention because packed hair can restrict airflow around the housing. Do not push debris deeper into the clipper with a sharp object.
What should stay inside the motor housing
Do not pour, spray, or submerge anything inside the clipper. Avoid opening the motor housing unless you are qualified to work on electrical equipment and have the correct service procedure for that model. Internal wiring, switches, bearings, and motor components are not part of ordinary end-of-day cleaning.
Stop home maintenance and arrange a professional assessment if the clipper has a burning smell. Grinding noise, intermittent power, or persistent overheating after the exterior and blade assembly are clean. The Barber Company provides clipper motor repairs, professional blade sharpening, and precision zero gapping from 0.1mm to 0.4mm for barbers who need more than surface care.
| Situation | Safe to handle at home | Bring to a technician |
|---|---|---|
| Hair packed around the blade and vents | Brush and blow out loose debris | Debris that stays trapped inside the housing |
| Blade needs cleaning or oil | Wash the removed blade, dry it, apply 2-3 drops of clipper oil | Blades that keep pulling after cleaning |
| Motor sounds or behaves differently | Confirm the exterior is clean and blades move freely | Grinding, burning smell, power loss, or overheating |
For a routine schedule, use this barber clipper maintenance checklist. For the broader process, follow the complete guide to barber clipper care and maintenance.
Signs Your Clipper Motor Needs a Deep Clean
Learning how to clean clipper motor areas starts with recognizing when routine brushing is no longer enough. Hair, oil, and debris around the blade assembly can restrict performance and transfer contamination. If cutting becomes weak, heat builds quickly, or the motor sounds different, stop and inspect the clipper before the next client.
A clipper does not always fail suddenly. Its performance often changes gradually as loose hair, skin particles, product residue, and lubricant collect around the blade assembly and ventilation openings. The following signs indicate that the clipper needs a careful deep clean, or that a professional should inspect it before continued use.
- Hair and debris are packed behind the blade. Impacted material can interfere with the moving blade and cause double-cutting. The University of Tennessee’s maintenance guidance also warns that trapped hair and dirt can rapidly dull blade edges. Read the academic clipper maintenance guidance for the underlying maintenance recommendation.
- The clipper cuts sluggishly or feels weak. A motor that sounds normal but struggles through hair may be working against a dirty, restricted blade assembly. Remove the blade according to the manufacturer’s instructions, brush away visible debris, and check whether the blade moves freely before assuming the motor itself is worn.
- The housing or blade area overheats quickly. Heat after sustained use can have several causes, including friction, restricted airflow, a dull blade, or an electrical fault. If the temperature rises unusually fast, unplug the clipper and review these clipper overheating fixes before using it again.
- The motor is louder or its pitch changes. A new buzz, rattle, or strained sound can reflect debris, inadequate lubrication, blade misalignment, or internal wear. Cleaning the accessible blade and housing areas is reasonable, but do not open the motor housing to chase a noise you cannot identify.
- Waxy or sticky build-up is visible. Pomade, spray, skin oils, and old lubricant can form a tacky layer that catches hair and restricts blade travel. Do not simply add more oil over it. Clean the blade surfaces first, then apply only the lubricant recommended for that clipper.
- The blade has not been disinfected daily. A 2020 study reported that clipper blades can harbor bacteria when they are not disinfected daily. The finding, indexed by the National Center for Biotechnology Information, reinforces that deep cleaning is not only about cutting performance. It is also part of responsible tool hygiene between clients.
Turn the clipper off and disconnect it before inspecting or cleaning. If brushing and proper blade care do not restore normal power, temperature, or sound. Treat the symptom as a possible repair issue rather than repeatedly forcing the motor through work.
Safe DIY Motor Cleaning: What Tools and Products to Use
Learning how to clean clipper motor components safely means cleaning the removable blade and accessible housing areas without exposing the electrical motor to liquid. Unplug the tool, remove hair and debris mechanically, wash the blade while the clipper is off, then dry and lubricate the clean blade before reassembly.
- Unplug the clipper and remove the blade. Disconnect the power cord or remove the battery according to the clipper manufacturer’s instructions. Take off the blade so you can inspect the cutting surfaces and the area where hair collects. Never begin maintenance with the clipper connected to power.
- Brush out impacted hair with a fine brush. Use a fine-toothed brush, such as a clean toothbrush, to work hair and compacted debris out from behind the sliding blade and around the blade hinges. The University of Tennessee’s maintenance guidance specifically recommends removing the blade and using a fine-toothed brush for impacted hair. Review the university’s clipper maintenance guidance for the source procedure.
- Blow debris away from the housing vents. Use short bursts of compressed air to clear loose hair from exterior vents and accessible openings. Hold the nozzle at an angle and avoid forcing debris deeper into the motor housing. Do not substitute water, a soaking rinse, or a wet cloth near electrical components.
- Wash the blade with the clipper switched off. Apply an appropriate blade wash or cooling spray only to the removed blade, following the product directions. A Barber Works continuous mist sprayer can help apply cleaning liquid in a controlled way. The clipper must remain off during washing because liquid can enter the housing. The University of Tennessee source states that the blade should not be on while using wash solution.
- Dry every blade surface completely. Wipe away residue with a clean, lint-free cloth and allow the blade to dry before putting it back on the clipper. Check between the moving and stationary blades for remaining moisture or clumped hair. Reassembly should wait until the cutting assembly is clean and dry.
- Apply two to three drops of clipper oil before reassembly. Place two or three drops across the clean blade, then run the blade manually or briefly distribute the oil according to the manufacturer’s care instructions. The blade must be cleaned before lubrication. Applying oil over impacted hair can make the hair clump and become trapped, as documented in the University of Tennessee clipper maintenance PDF. Choose Wahl clipper oil or Andis clipper oil, and compare additional clipper oil and lubricants for your equipment.
Reattach the blade only after the cleaning and lubrication steps are complete. If the clipper still overheats, loses power, grinds, or smells burnt, stop using it rather than forcing the motor through another cleaning cycle. Those symptoms point beyond routine blade care and warrant professional inspection.
What You Should Never Do to a Clipper Motor
Safe maintenance keeps hair and debris away from the motor without exposing electrical parts to moisture, incorrect lubricants, or unnecessary disassembly. Turn the clipper off before cleaning, keep liquids on the removable blade only, and send persistent electrical or mechanical problems to a qualified technician.
These mistakes can turn routine clipper care into a repair bill. Keep the motor housing dry and treat the internal assembly as a serviceable electrical system, not as another surface to scrub.
- Never run water over the motor or electrical components. Water can enter the housing, create a short circuit, and promote rust. If you use a blade wash, remove or isolate the blade as directed and keep the clipper switched off. The University of Tennessee’s maintenance guidance specifically warns that the clipper should not be on during blade washing because liquid can enter the housing: review the blade-maintenance guidance.
- Never use WD-40 or household lubricants as clipper oil. General-purpose products can dry out, leave an unsuitable film, and attract hair and debris. Use professional clipper oil made for grooming-tool blades and bearings instead. Apply it only after the blade has been cleaned, following how to properly oil clipper blades.
- Never dismantle the motor housing or touch internal wiring without the correct training. Opening the housing can create a safety hazard and may affect warranty coverage. A brush and controlled exterior cleaning are appropriate maintenance; diagnosing wiring, switches, brushes, or motor faults belongs with a technician.
- Never oil blades while they are packed with hair. Lubricant can cause impacted hair to clump and become trapped between the moving and stationary blades. Clean the blade first, then lubricate it. This is not a cosmetic detail. Entrapped hair and dirt can cause double-cutting and rapidly dull the blade edges, according to the University of Tennessee source above.
- Never use generic rubbing alcohol as your default disinfectant. It can dry out the lubricants that help the blade move smoothly. Use a product designed for clipper disinfection, follow its label, and re-oil the clean blade when appropriate. Do not pour any disinfectant into the motor housing.
Stop cleaning and unplug the tool if you notice a burning smell, grinding, exposed wiring, or repeated power loss. Continuing to run a damaged motor can worsen the fault and make a straightforward service issue more expensive.
When Cleaning Is Not Enough: Signs of Motor Wear
Learning how to clean clipper motor components helps remove debris, but cleaning cannot correct worn bearings, damaged windings, or failing brushes. Grinding, burning odors, repeated power loss, heavy carbon build-up, and persistent overheating indicate a clipper that needs bench diagnosis rather than another round of brushing and oiling.
A clipper should sound and feel consistent through a cut. A new grinding or rattling noise can point to mechanical wear inside the drive system. While a burning smell may indicate excessive electrical resistance, overheated components, or brush wear. Stop using the clipper if either symptom appears. Continuing to run it can turn a repairable fault into broader motor or wiring damage.
Power loss and mid-cut shutdowns
Watch for a motor that slows under normal cutting pressure, pulses instead of running steadily, or cuts out during a service and restarts only after cooling. Freshly cleaned blades and proper oil should reduce drag. If the clipper still loses power, the motor may no longer be delivering consistent torque. Blades that pull hair despite being sharp, aligned, and freshly oiled are another reason to stop troubleshooting at the surface.
Carbon build-up and overheating
Excessive dark carbon dust around the brush area is not ordinary hair debris. It can signal brush wear or arcing that requires inspection. Likewise, a clipper that becomes unusually hot after a normal session, then continues overheating after cleaning, should not be treated with more lubricant. Excess heat can reflect internal friction or an electrical fault.
Blade oil remains essential preventive care. A professional maintenance guide recommends oiling blades every two to three haircuts, following the manufacturer’s directions and avoiding excess oil. That routine protects the blade assembly, but it does not repair a failing motor. For a second opinion, see the professional clipper repair in Las Vegas team for a bench diagnosis. If the issue is heat rather than noise, the clipper overheating fixes guide can help you distinguish routine maintenance from a service problem.
Clipper Motor Repair in Las Vegas: Professional Diagnosis
A home cleaning routine can remove hair and surface debris, but it cannot correct internal motor wear, damaged wiring, or a failing drive system. The Barber Company provides professional clipper motor repairs, blade sharpening, and precision zero gapping from 0.1mm to 0.4mm. Bring the tool in when cleaning no longer restores reliable performance.
Repeated deep cleans are not a substitute for diagnosis. If a clipper remains weak after the blades are cleaned, lubricated, and correctly reassembled, the problem may be inside the motor or power system. A persistent grinding sound, a burning smell, visible carbon around the brushes, or power that drops during a service all justify a professional inspection.
What a bench diagnosis can identify
At-home maintenance is appropriate for removing loose hair, cleaning the blade set, and applying the correct clipper oil. It is not a safe way to troubleshoot every internal fault. A technician can separate a blade, alignment, lubrication, motor, and electrical problem instead of having you repeat the same cleaning cycle and hope the symptom disappears.
This distinction matters in a busy shop. A clipper that pulls, stalls, or loses speed can affect consistency from one client to the next. Continuing to use it may also put unnecessary load on components that are still serviceable. Stop using the tool if you notice heat, smoke, an electrical odor, or abnormal noise. Do not introduce water into the housing or dismantle wiring without the proper technical experience.
Technical services for working barbers
The Barber Company is built for barbers by barbers, so the goal is practical tool performance, not a generic recommendation to replace equipment. The in-store technical bench handles professional clipper repair in Las Vegas, professional blade sharpening, and clipper motor repairs. Blade condition and motor performance are assessed together because a sharp, correctly aligned blade cannot compensate for a motor that is losing power.
When the blade setup needs refinement after repair or sharpening, ask about the zero gapping and oiling service in Las Vegas. Precision adjustments from 0.1mm to 0.4mm should be handled carefully, with attention to alignment and safe cutting performance rather than an aggressive setting that creates avoidable irritation risk.
Bring the clipper, its power cord or charging equipment, and any blade set that was installed when the problem appeared. Describing when the symptom starts, such as immediately after powering on or only after extended use, gives the technician useful context. If the clipper has been exposed to liquid, mention that before testing it again.
A professional diagnosis also helps you make a better repair-versus-replacement decision. Some performance complaints come from the blade assembly or adjustment rather than the motor itself. Identifying that difference can prevent unnecessary parts purchases and restore a reliable tool to your station with the right service.
Schedule a drop-off or call (702) 900-9972 before bringing in a problem clipper. HABLAMOS ESPAÑOL, and the team can help determine whether the next step is routine maintenance, sharpening, zero gapping, or motor repair.
Frequently Asked Questions
How often should I clean my hair clippers?
Brush hair and loose debris from the blades after every use, especially when the clipper is used on multiple clients. A deeper cleaning is appropriate when buildup affects cutting performance, causes heat, or traps lubricant. Regular maintenance helps prevent impacted hair and dirt from causing double-cutting and rapid blade dulling, as documented by the University of Tennessee’s clipper maintenance guidance.
Can I use water to clean my hair clipper motor?
No. Keep water and liquid away from the motor, wiring, and internal housing because moisture can create electrical faults and promote corrosion. If you use a blade wash, turn the clipper off first and keep the solution on the removable blade area only. Never run the clipper while washing the blades.
How do I remove hair and gunk from inside the clipper?
Unplug or switch off the clipper, remove the blade when the design allows. And use a fine-toothed brush to lift packed hair from the blade and accessible housing edges. Compressed air can help clear loose debris from hard-to-reach areas, but do not force debris deeper into the motor or spray liquid into the housing.
What should I lubricate my clippers with?
Use professional clipper oil made for grooming equipment, applied only after the blades are clean and dry. Lubricating hair-impacted blades can make the hair clump and become trapped, so clean first, then apply a light amount to the blade contact points. Avoid WD-40 and general household lubricants.
How do I know if my clipper motor needs professional repair?
Stop using the clipper and seek professional diagnosis if it develops grinding or unusual mechanical noise, a burning smell, repeated power loss, persistent overheating, or visible carbon buildup. Cleaning cannot correct worn motor components, damaged wiring, or electrical faults. A technician can determine whether the motor needs repair or the clipper needs related blade service.
Ready to Keep Your Clipper Working Reliably?
Routine cleaning can protect performance, but grinding, overheating, burning smells, or ongoing power loss may require a professional diagnosis. The Barber Company helps Las Vegas barbers address clipper motor problems and keep essential equipment ready for the next service. Call The Barber Company at (702) 900-9972 to schedule your clipper motor repair or maintenance drop-off. You can also ask about professional clipper care products and local delivery options when you contact the team.