
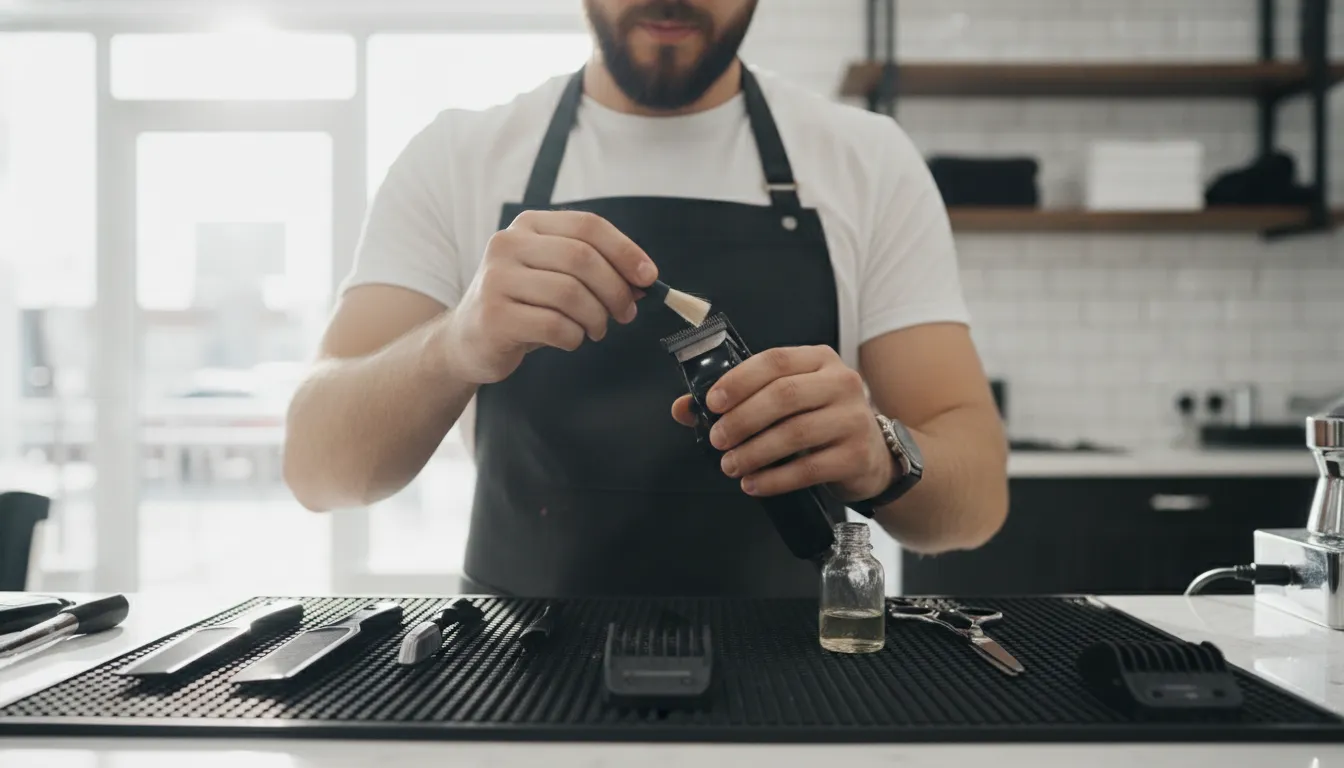
A clipper that runs hot, pulls through hair, or leaves an inconsistent fade is usually giving you a maintenance warning before it becomes a costly repair. In a busy shop, a reliable routine protects cutting performance, supports sanitation, and keeps your tools ready for the next client. The Complete Guide to Barber Clipper Care and Maintenance explains the broader care system behind that routine. Stop by The Barber Company in Las Vegas for professional clipper supplies and maintenance support.
A barber clipper maintenance checklist should divide care into daily, weekly, and monthly tasks: brush out hair and product. Disinfect and dry the blades, oil them between clients, then inspect the housing, tension, ventilation ports, and alignment on a regular schedule. This layered approach helps reduce friction, heat, buildup, and avoidable performance problems.
When you need to restock a working station, compare wholesale barber equipment and supplies in Las Vegas with the maintenance products already in your kit.
The most important work happens immediately after each service, while debris and moisture are still easy to remove. Start with the after-client routine, then build the deeper inspections into your weekly and monthly shop schedule.
Barber Clipper Maintenance Checklist: Daily Clipper Maintenance: What to Do After Every Client
To know if your clipper is truly clean, start with the daily routine. It removes hair, lubricates moving surfaces, disinfects the blade set, and returns the clipper to a controlled cleaning station. These few steps reduce buildup, friction, heat, and cross-contamination while keeping the tool ready for the next precise cut.
-
Brush hair from the blade and housing
Turn the clipper off and unplug it when applicable. Hold the blade set away from your body and use a dedicated stiff-bristled clipper brush to work between the teeth. Along the moving cutter, and around the blade hinge. Fine hair can pack into narrow gaps where a soft cosmetic brush will not reach. Also brush the visible housing, lever area, and guard before applying any liquid. Hair, product, and moisture left to dry on tools can create buildup that contributes to performance deterioration and cross-contamination. The right brush is part of the tool, not an optional accessory. Source: clipper cleaning guidance.
-
Apply one to two drops of clipper oil
After brushing, place one to two drops of clipper oil across the blade teeth and the points where the cutter moves against the stationary blade. Run the clipper briefly, then wipe away excess oil so it does not collect dust or transfer heavily to the next client. Oil the blades after every client, not only when they begin to squeak. Consistent lubrication minimizes friction-generated heat and helps extend blade life. If the blade feels unusually hot, stop and inspect it for insufficient lubrication, debris, or misalignment before continuing. Read more about proper clipper blade oiling techniques.
-
Disinfect the blade set
Once loose debris and excess oil are removed, disinfect the blade according to the product label. Use a professional clipper disinfectant spray, or an appropriate solution containing at least 70% isopropyl alcohol when compatible with the manufacturer’s instructions. Cover the cutting surfaces evenly, allow the required contact time, and let the blade dry completely. Never skip sanitation because the next service is short. Cleaning and sanitizing between customers helps prevent cross-contamination, while thorough disinfection supports a clean working environment. Do not soak an assembled clipper or spray directly into the motor housing.
-
Reset the dedicated cleaning station
Keep brushes, oil, disinfectant, disposable towels, and a waste container together in one dedicated station. Separate clean supplies from used towels and place each sanitized clipper in a dry, protected location rather than on a cluttered workstation. A centralized cleaning station makes maintenance an efficient part of the workflow instead of a task that gets postponed during a busy day. Use this daily clipper sanitation routine as the repeatable standard, then refer to The Complete Guide to Barber Clipper Care and Maintenance for the weekly and monthly cycles.
Weekly Clipper Maintenance: Deep Clean and Blade Check
A weekly deep clean reaches the hair and dust that daily brushing cannot remove. Take off the blade assembly, clean the internal housing, confirm the blades sit correctly, and inspect the power cord. This deeper pass supports reliable motor function, safer operation, and consistent cutting throughout a busy week.
-
Remove the blade assembly safely
Unplug a corded clipper and switch off any cordless model before starting. Use a properly fitting Phillips head screwdriver to remove the blade assembly screws, keeping the screws together so they are not lost or mixed with another tool’s hardware. Work over a clean towel or tray, and avoid forcing a screw that is binding. The weekly routine calls for removing the clipper blade set and cleaning the housing, not disassembling the motor or opening components that are not designed for routine service.
-
Brush the housing and blade set
Use a dedicated stiff-bristled clipper brush to clear loose hair from the blade teeth, mounting area, and internal clipper housing. Pay particular attention to corners and the area around the drive mechanism, where accumulated debris can restrict airflow or interfere with movement. F017 identifies weekly blade removal and housing cleaning as part of maintaining optimal motor function. Keep liquid away from the motor and electrical components unless the manufacturer’s instructions specifically permit it. Wipe away residue, then let cleaned parts dry completely before reassembly.
-
Check alignment and cutting feel
Before tightening the assembly, verify that the moving and stationary blades are seated evenly and that the cutting edge is not projecting into an unsafe position. Proper alignment helps prevent nicks and supports a smooth, comfortable cut. If the clipper starts pulling hair instead of cutting cleanly, stop using it and inspect the alignment. A pulling sensation commonly indicates misaligned blades or dull teeth. Correct the adjustment only if you know the model’s procedure; otherwise, set it aside for sharpening or service.
-
Reassemble, oil, and inspect the cord
Replace the blade assembly, tighten the Phillips screws evenly, and apply the manufacturer’s recommended clipper oil before testing the tool. Oiling after cleaning helps reduce friction and heat, but do not flood the housing or leave excess oil where it can attract debris. Finally, inspect the power cord from the plug through the strain relief and into the clipper body. Look for fraying, cuts, exposed wiring, crushed sections, or looseness. Inspect the cord for signs of wear or damage before and after each shift because a damaged cord creates an electrical hazard. Remove a damaged clipper from service rather than taping over the problem.
Keep this weekly inspection alongside your daily routine. For the complete maintenance schedule, see The Complete Guide to Barber Clipper Care and Maintenance.
Monthly Clipper Maintenance: Full Inspection and Oiling
A barber clipper maintenance checklist should include a monthly inspection of springs, ventilation ports, blade alignment, screws, and lubrication points. This deeper review catches wear before it affects cutting consistency, overheats the motor, or creates an uncomfortable service for the client. Record any adjustment or repair before returning the tool to daily use.
Monthly maintenance is different from brushing hair away after a cut. It is a controlled inspection of the parts that determine blade movement, motor cooling, and safe handling. Unplug corded clippers and remove the battery from cordless models when the manufacturer permits it. Work on a clean, dry station so loose hair and oil do not become new sources of buildup.
Inspect the tension springs
Check each tension spring for corrosion, deformation, or a noticeable loss of elasticity. The springs help maintain reliable blade pressure and movement. If one feels weak or the moving blade no longer tracks consistently, do not compensate by overtightening the blade screws. Inspect the tension setting and make the appropriate adjustment. Checking tension springs every month is important because lost elasticity can affect blade speed and cutting consistency. For a detailed procedure, follow this guide to adjusting clipper blade tension.
Clear ventilation ports and inspect the housing
Use a dry brush or compressed air approved for the device to clear dust and hair from every ventilation opening. Do not force debris deeper into the housing or saturate the motor area with liquid. Ventilation ports should be completely clear each month to help prevent motor overheating during heavy daily use. If the clipper runs unusually hot, stop and investigate. Heat can indicate poor lubrication, blade misalignment, or hair trapped between the cutting teeth.
Confirm alignment and fasteners
With the blade set clean, verify that the stationary and moving blades sit squarely and that the teeth are not projecting into a position that could nick skin. Correct alignment supports a smooth, comfortable cut. Pulling rather than cutting cleanly is a warning sign that the blades may be misaligned or dull. Check every external screw, including housing and blade screws, and tighten loose fasteners carefully. Screws that vibrate loose can contribute to vibration and motor stress. Avoid excessive force, which can strip threads or distort the housing.
Finish with a light application of clipper oil at the manufacturer’s recommended points, then run the clipper briefly and wipe away excess. Note any spring wear, repeated overheating, loose screws, or alignment problem in the shop’s maintenance log. A recurring fault is a reason to remove the clipper from service for professional inspection rather than returning it to a busy station.
Quarterly Tasks: When to Bring Clippers In for Professional Service
A barber clipper maintenance checklist should include a professional inspection every few months, plus immediate service when performance changes. Overheating, unusual motor noise, persistent pulling, or snagging can indicate problems that cleaning and oiling will not solve. Professional sharpening, zero gapping, and motor repair help restore safe, consistent cutting.
Daily sanitation, lubrication, and routine inspections protect your equipment, but they cannot correct every mechanical or blade problem. Treat quarterly service as a practical checkpoint for clippers and trimmers that carry a heavy workload. Bring a tool in sooner if it has been dropped, the blade has a visible nick. Or the clipper no longer delivers a clean cut after basic cleaning and oiling. Damaged or nicked cutting components require professional attention rather than continued use.
Recognize the signs before a clipper fails
Heat is an early warning sign. A blade that becomes unusually hot may have poor lubrication, debris packed between the teeth, or misalignment. Clean and oil the tool first, then stop using it if the heat returns quickly. Regular motor maintenance is also important for maintaining motor efficiency and power, especially when a clipper is used continuously throughout a busy shop day.
Listen for unusual buzzing, rattling, or changes in motor pitch. Persistent pulling or snagging is another clear reason to schedule service. Misaligned or dull blades can pull hair instead of cutting cleanly, creating an uncomfortable client experience and making fades harder to control. Do not compensate by pressing harder or making repeated passes over the same area. Have the blade alignment and cutting set evaluated.
Restore blade performance with professional sharpening
Professional sharpening restores blade keenness when routine brushing, disinfection, and oiling are no longer enough. Periodically sending blades to a professional sharpener can significantly extend clipper life, while also helping the tool maintain a clean, controlled cut. Use The Barber Company’s professional clipper blade sharpening service when blades feel dull, snag hair, or show wear that affects your work.
Sharpening is not a substitute for replacing severely damaged components. A technician can help determine whether a blade set should be sharpened, aligned, or replaced, reducing guesswork and preventing avoidable damage to the clipper.
Use zero gapping and motor repair for specialized problems
Precision zero gapping is valuable when trimmers or clippers need cleaner lines and tighter edging. The Barber Company performs zero-gap adjustments in the 0.1mm to 0.4mm range, giving barbers a precise setup for detailed fades and finishing work. Because an overly aggressive adjustment can create safety and comfort issues, have the setting checked by a trained technician rather than forcing the blade position yourself.
If the tool loses power, overheats despite proper cleaning, or produces persistent internal noise, the issue may involve the motor or another internal component. The Barber Company provides Las Vegas clipper repair service in Las Vegas, including clipper motor repairs, blade sharpening, and precision zero gapping. Schedule a drop-off or contact the store at (702) 900-9972 before a failing tool disrupts your appointments.
Printable Clipper Maintenance Checklist for Your Barber Station
A reliable barber clipper maintenance checklist turns tool care into a repeatable station habit. Use a dedicated cleaning area, assign daily, weekly, and monthly tasks, and record anything that needs service. Consistent upkeep reduces avoidable wear, supports clean cutting performance, and protects the money invested in professional clippers and trimmers.
Print this checklist and keep it beside your tools. A dedicated cleaning station makes maintenance part of the workflow instead of something postponed until a clipper performs poorly. Stock it with a stiff-bristled brush, clipper oil, approved disinfectant, a dry cloth, and a safe place for tools to cool and dry. A Barber Station Organizer keeps those supplies and your clippers separated, visible, and easier to return to the correct place.
| Frequency | Time Required | Key Tasks | Tools Needed |
|---|---|---|---|
| After every client | 1-2 minutes | Brush, oil, disinfect | Stiff brush, clipper oil, disinfectant spray |
| Daily closing | 3 minutes | Full brush, blade check, cord inspect | Brush, oil, cloth, iso alcohol |
| Weekly | 10-15 minutes | Remove blade, deep clean housing, check alignment | Screwdriver, brush, towel, oil |
| Monthly | 15-20 minutes | Tension check, vent clear, fastener torque, full oil | Compressed air, brush, screwdriver, oil |
| Quarterly | Drop-off | Professional sharpening, zero gapping, motor service | Professional technician |
Daily checklist: after every client and at closing
- Brush hair and product residue from between the blade teeth and around the housing.
- Disinfect the blade according to the product directions, then allow it to dry fully.
- Apply the correct amount of blade oil after each client. Lubrication minimizes friction-generated heat and helps extend blade life.
- Check for unusual heat, pulling, vibration, or a change in cutting sound. A hot blade can indicate poor lubrication, misalignment, or debris buildup.
- Inspect the cord, casing, blade screws, and lever for visible damage or looseness.
- Store the clipper in a clean, dry position rather than under loose tools, towels, or hair.
Weekly checklist: deep clean and reset
- Unplug the clipper and remove the blade set using the manufacturer’s instructions.
- Brush accumulated hair and dust from the blade set, housing, and accessible motor area.
- Clean the blade contact surfaces, dry every component completely, and reassemble carefully.
- Confirm blade alignment and test the clipper on startup. If it pulls hair instead of cutting cleanly, take it out of service for inspection.
- Wipe the dedicated cleaning station and restock oil, brushes, disinfectant, and cloths.
Monthly checklist: inspect the equipment
- Clear dust and debris from ventilation ports to help prevent motor overheating during heavy use.
- Inspect tension springs for lost elasticity, which can affect blade movement and cutting consistency.
- Check external screws, blade alignment, guards, and power connections again.
- Record recurring heat, pulling, noise, or power issues and schedule professional attention before they interrupt your work.
Daily, weekly, and monthly cycles create a comprehensive upkeep routine. They also make problems easier to spot while they are still manageable, helping protect your equipment investment and maintain the consistent results clients expect.
What Maintenance Products Does The Barber Company Carry?
The right maintenance products keep blades lubricated, disinfected, organized, and ready for high-frequency shop use. The Barber Company in Las Vegas stocks professional oils, sprays, replacement blades, storage solutions, and Barber Works accessories. With local support for choosing the supplies that fit your clippers, trimmers, shears, and daily workflow.
A reliable station starts with the basics. Clipper oil belongs in every barber’s maintenance kit because regular lubrication reduces friction and helps blades maintain peak performance. Apply it after cleaning and between clients according to the manufacturer’s directions. If blades become noticeably hot, stop and inspect them for poor lubrication, misalignment, or hair trapped between the teeth. Read these proper clipper blade oiling techniques for a more precise application routine.
Oils, Coolants, and Disinfectants
For sanitation, products such as Andis Cool Care Plus 5-in-1 provide a practical option for cooling and treating clipper blades during a busy day. Disinfection is not a cosmetic step. Thoroughly disinfecting blades helps eliminate pathogens and reduces the risk of transmitting infections, so follow the product label and allow the blade to dry before applying oil.
Use coolant sprays thoughtfully. Excessive application can leave a film that attracts hair and dust, creating the buildup you are trying to remove. A stiff-bristled clipper brush, a clean cloth, and correctly applied disinfectant support a repeatable cleaning process without replacing routine inspection.
Replacement Blades and Organized Storage
Replacement blades are the correct next step when sharpening no longer restores a clean cut, or when teeth are nicked, damaged, or persistently pulling hair. Continuing to force a worn blade through a service can compromise cutting consistency and client comfort. The Barber Company can help match replacement components to your equipment.
Storage matters just as much as the products used on the blade. The Barber Station Organizer keeps clippers, trimmers, combs, brushes, and related tools in a dedicated location. A centralized cleaning and storage station makes maintenance easier to repeat and helps protect equipment from falls, moisture, and unnecessary counter clutter.
Barber Works Tools for the Daily Station
The Barber Works line adds practical accessories for routine service: the Continuous Mist Sprayer for controlled moisture. Styling Powder for finishing and texture work, and Taper Comb with Hybrid Ceramic for taper and blending workflows. These products complement the maintenance essentials without replacing cleaning, disinfection, lubrication, or blade inspection.
The Barber Company also stocks professional brands including Gamma+, Wahl, BaByliss Pro, StyleCraft, Andis, and Utsumi Shears. Visit the Las Vegas storefront for equipment guidance, or request free same-day local delivery on orders over $50 throughout Las Vegas, Henderson, and North Las Vegas.
Frequently Asked Questions
How often should barber clippers be oiled?
Oil the blade set between every client, after brushing away loose hair and debris. Regular lubrication reduces friction-generated heat and helps extend blade life. Apply only the amount recommended for the blade design, then run the clipper briefly and wipe away excess before returning it to service. Proper clipper blade oiling techniques can help standardize the process.
Why do my clipper blades get hot during a haircut?
Heat commonly signals insufficient lubrication, blade misalignment, or hair packed between the cutting teeth. Stop and disconnect the clipper, brush the blade thoroughly, inspect alignment, and re-oil before continuing. If the blade heats up again quickly, remove it from rotation and have the mechanism inspected rather than exposing a client to an uncomfortable cut.
What should I do if my clipper starts pulling hair?
Pulling usually indicates dull teeth or misaligned blades. Clean the blade set first, confirm that the moving and stationary blades are positioned correctly, and check tension before testing the tool on a comb or practice section. If the problem remains, the blade may need sharpening or replacement. Do not continue using a clipper that cannot cut smoothly.
Can I use clippers on damp hair?
Avoid using clippers on excessively wet hair unless you can sanitize, dry, and oil them immediately afterward. Trapped moisture can promote blade oxidation and rust. Dry the blade set completely, remove hair and product residue, and store the clipper in a clean, dry location before its next use. Daily clipper sanitation guidance provides the supporting workflow.
Ready to Keep Your Clippers Performing at Their Best?
A consistent maintenance routine protects your tools and helps you work with greater confidence throughout the day. Stop by The Barber Company in Las Vegas for professional-grade clipper maintenance products, blade sharpening services, and practical advice for your setup. To discuss the right maintenance support, call The Barber Company at (702) 900-9972.