
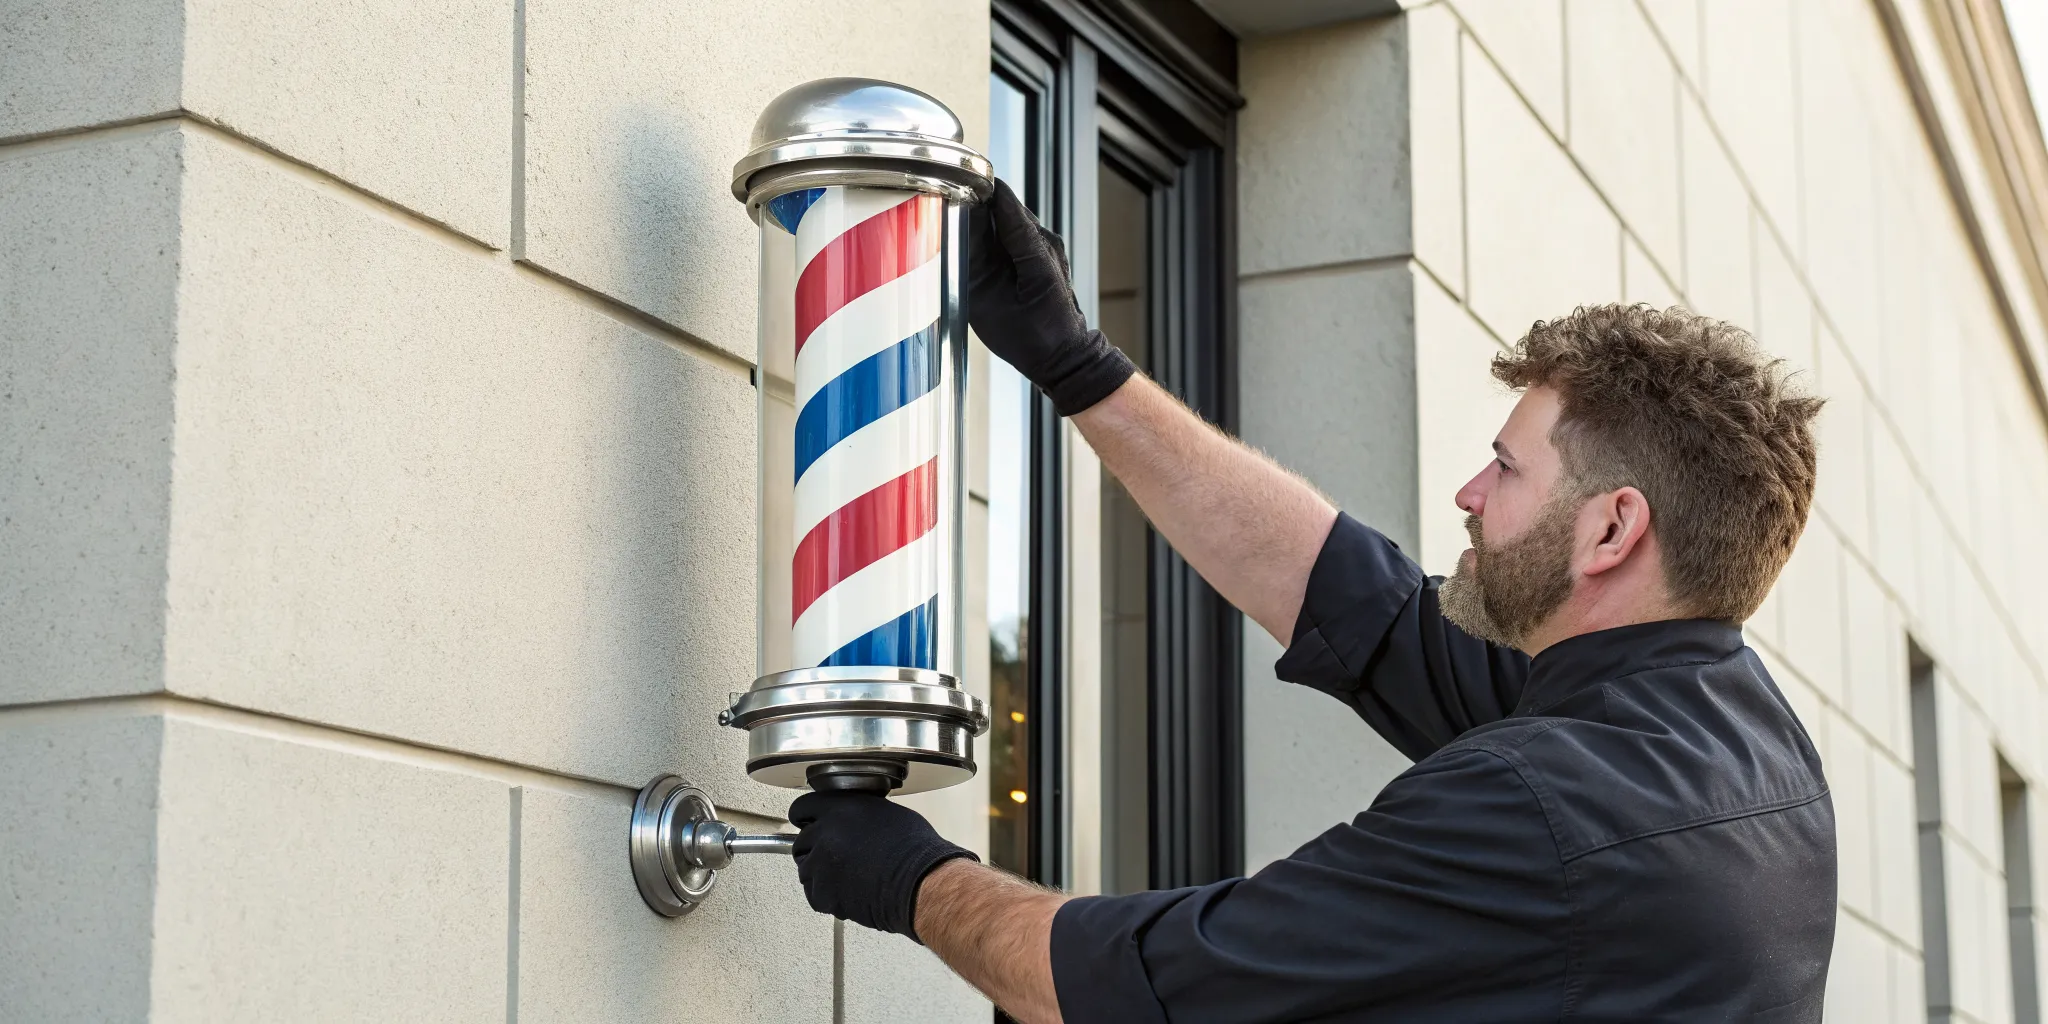
That spinning red, white, and blue cylinder you’re about to hang is so much more than a sign. It’s a piece of history, a symbol of a time-honored craft stretching back to when barbers were also surgeons. Its stripes tell a story of blood, bandages, and the staff patients would grip during procedures. By adding one to your shop, you’re connecting to a deep legacy of skill and community. This guide is here to help you honor that tradition by showing you exactly how to install a barber pole safely and securely, ensuring this iconic beacon shines brightly for your business for years to come.
Key Takeaways
- Mount It Securely and Wire It Safely: Your pole is heavy, so always anchor it to a wall stud for proper support. When wiring, double-check that every connection is tight and never skip connecting the green ground wire, which is a critical safety feature.
- Place Your Pole for High Visibility: Think of your barber pole as a 24/7 marketing tool. Install it in a location with a clear line of sight from the street and sidewalk, ensuring it catches the eye of potential clients and isn’t hidden by trees or other signs.
- Choose a Style That Fits Your Brand: Decide if a classic, motor-driven spinning pole or a modern, stationary LED pole is right for you. Your choice affects your shop’s aesthetic, the amount of maintenance required, and how you connect with the pole’s iconic history.
More Than Just Stripes: The History of the Barber Pole
That spinning pole you’re about to install is more than just a sign; it’s a piece of history. Its story is a fascinating one that stretches back centuries, representing a tradition of skill, service, and community. Before you mount it on your wall, it’s worth knowing the rich history you’re becoming a part of. The barber pole is an iconic symbol recognized worldwide, and its origins might surprise you. It tells a story of when barbers were not just stylists but also trusted medical practitioners in their communities. Understanding this history adds a layer of pride to every haircut and shave you give beneath its classic red, white, and blue glow.
From the bustling streets of medieval Europe to the modern-day shop on the corner, the barber pole has stood as a beacon. It signals a place of transformation, conversation, and craftsmanship. While today it promises a sharp fade or a clean shave, its stripes tell a much deeper, and slightly grislier, tale. This history is what separates a barber from other stylists and connects you to a lineage of professionals who were central figures in their towns. As you prepare your tools for installation, take a moment to appreciate the legacy you’re upholding. This symbol on your wall will do more than attract customers; it will declare your commitment to a time-honored craft.
From Medieval Surgery to Modern Shaves
Believe it or not, the story of the barber pole begins in the Middle Ages, when barbers did a lot more than just cut hair. They were known as barber-surgeons, and their services included pulling teeth, setting bones, and performing minor surgical procedures. One of the most common practices was bloodletting, a procedure thought to cure illness by removing blood from a patient. Barbers would give patients a staff to grip tightly, which made the veins in their arm more prominent. This medical history is the foundation of the pole’s symbolism and a direct link to the roots of the barbering profession.
What Do the Red, White, and Blue Stripes Mean?
The iconic colors of the barber pole are a direct nod to its medical past. The red stripe represents the blood from the bloodletting procedure, while the white stripe symbolizes the clean bandages used to dress the wounds. The pole itself is a tribute to the staff patients would squeeze during the process. So, what about the blue? The meaning of the blue stripe is debated. Some historians believe it was added to represent the veins, while others suggest it was incorporated in America to reflect the patriotic colors of the national flag. Either way, the combination creates a striking and memorable symbol.
How the Pole Became a Symbol of Community
Over time, the medical and barbering professions went their separate ways, but the pole remained firmly with the barbers. Today, it serves as an unmistakable sign for a place where people can get a great haircut, a clean shave, and enjoy a sense of community. The pole has become such a cherished emblem of the trade that its use is sometimes debated. In some areas, professional barbers have argued that only licensed barbershops should have the right to display the pole, viewing it as a unique symbol of their specific history and craft. It stands as a proud marker of a timeless profession.
Gather Your Tools and Materials
Before you start drilling holes, let’s get everything you need in one place. A little prep work now will make the entire installation process much smoother and save you from making extra trips to the hardware store. Think of it as setting up your station before a client comes in; having all your tools ready makes the job easier and more professional. From the pole itself to the screws that will hold it in place, gathering your materials is the first real step toward bringing this classic symbol to your shop.
This part of the process is about making smart choices for your specific space. You’ll need to decide on the right style of pole for your shop’s aesthetic, figure out what tools you need for the job, and choose between a classic spinning pole or a modern stationary one. Let’s walk through it.
Your Complete Tools and Materials Checklist
Most barber poles come with the necessary mounting hardware, but it’s always a good idea to check the box before you begin. You don’t want to be halfway up a ladder before realizing you’re missing a crucial screw. Here’s a general list of what you’ll likely need to have on hand for a standard installation:
- Your new barber pole
- Mounting bracket and screws (usually included)
- Drill with various drill bits
- Stud finder
- Level
- Measuring tape
- Pencil or marker
- Screwdriver
- Wire strippers and wire nuts (for hardwiring)
Having these items ready will help you move through the installation without any interruptions. It’s always better to have a tool and not need it than to need it and not have it.
Choose the Right Barber Pole for Your Space
Barber poles aren’t one-size-fits-all. While traditional poles were made of wood, modern versions come in durable materials like plastic, metal, and acrylic. Your choice depends on the look you want and how much weather it might face if installed outside. A sleek metal pole might fit a modern shop, while a more classic design could suit a traditional space.
Beyond aesthetics, consider the pole’s weight. Some are surprisingly heavy, and you’ll need to mount them securely to keep them stable. The safest way to hang a heavy barber pole is to locate a stud in your wall. This provides a solid anchor point that can easily support the weight, ensuring your pole stays put for years to come.
Spinning vs. Stationary: Which One Should You Get?
The quintessential spinning barber pole is an icon for a reason. The motion creates a captivating visual illusion where the stripes appear to travel up or down, grabbing the attention of passersby. This movement is a powerful, classic way to signal your trade and draw clients in. If you want to make a statement and have that timeless barbershop feel, a spinning pole is an excellent choice.
On the other hand, stationary poles, often lit with LEDs, offer a more modern and low-maintenance alternative. They provide the same recognizable color scheme without any moving parts, which means no motor to worry about. Your decision may also depend on local sign ordinances, as some areas have restrictions on moving signs. Consider your shop’s vibe and your willingness to perform maintenance when making your choice.
Find the Perfect Spot for Your Barber Pole
Okay, you’ve got your pole. Now, where should it go? Choosing the right spot is one of the most important parts of the installation. This isn’t just about finding a place where it fits; it’s about making a strategic decision that will help draw people into your shop. The location of your barber pole can make the difference between being the most recognized shop on the block and just another storefront. Before you drill any holes, let’s walk through how to pick the perfect place for it to shine.
Should You Mount It Indoors or Outdoors?
The first big decision is whether to place your pole inside or outside. There’s no single right answer, as it really depends on your shop’s layout and the vibe you’re going for. An outdoor pole is the classic choice, acting as a beacon for anyone walking or driving by. It immediately signals what you do and adds timeless curb appeal. On the other hand, an indoor pole can be a unique design element that adds to your shop’s interior aesthetic. It’s also protected from weather and potential vandalism. Consider your storefront’s architecture and any local sign ordinances before you decide, as there are a few technical aspects to keep in mind for either location.
Consider Height and Visibility
Once you’ve decided on indoors or outdoors, think about sightlines. Your pole needs to be seen to work its magic. For an outdoor pole, a good rule of thumb is to mount it about six to eight feet off the ground. This puts it above the heads of people on the sidewalk but still low enough to catch the eye. You want to make sure it’s clearly visible to both foot traffic and people in their cars. Think of your pole as a 24/7 marketing tool for your business. Placing it in a high-visibility spot is one of the easiest ways to attract new clients and let the whole neighborhood know where to get a great haircut.
How to Install Your Barber Pole, Step by Step
Installing your barber pole is a rewarding project that brings a classic touch to your shop. While it might seem intimidating, especially with the electrical wiring involved, breaking it down into simple steps makes it completely manageable. This guide will walk you through the physical mounting process, from picking the perfect spot to making sure your pole is secure. Think of it as the foundation of your installation. A solid, level mount is essential for safety and for the pole to operate correctly for years to come. A poorly mounted pole can be a hazard, and it can also cause unnecessary wear on the spinning mechanism. Before you get started, read through all the steps to get a clear picture of the process. We’ll cover the wiring in a later section, so for now, let’s focus on getting that iconic symbol up on your wall. Having a friend to help you lift the pole is a great idea, so you might want to line someone up before you begin. With the right tools and a little patience, you’ll have it mounted perfectly. Let’s get that pole mounted.
Step 1: Prep and Mark Your Mounting Surface
First things first, you need a clean slate. Wipe down the wall where you plan to hang your pole to remove any dust or grime. This ensures the mounting bracket will sit flush against the surface. Next, decide on the exact placement. Use a tape measure to get the height just right, then hold the mounting bracket against the wall. With a pencil and a level, mark where your drill holes will go. Taking a few extra minutes to get your markings perfect now will save you the headache of a crooked barber pole later. Double-check your marks before you move on to the next step.
Step 2: Find a Stud and Drill Pilot Holes
Your barber pole is heavy, so you can’t just attach it anywhere on the drywall. You need to anchor it to a wall stud, which is the vertical wood frame inside your wall. The easiest way to locate a stud is with an electronic stud finder. Once you’ve found one, confirm your pencil marks from the previous step are aligned with it. Now, it’s time to drill. Select a drill bit that’s slightly smaller in diameter than your mounting screws. Drilling pilot holes first prevents the wood stud from splitting and makes it much easier to drive the screws in securely.
Step 3: Secure the Mounting Bracket
With your pilot holes drilled, you’re ready to attach the bracket. Line up the bracket with the holes and use a drill or a socket wrench to drive in the mounting screws or lag bolts that came with your pole. Don’t tighten them all the way just yet. Place your level on the bracket one last time to confirm it’s perfectly straight, then tighten the screws until the bracket is completely firm against the wall. It shouldn’t wiggle at all. Depending on your pole’s design, you may need to feed the electrical wires through an opening in the bracket at this stage.
Step 4: Attach the Pole to the Bracket
This is the part where a second set of hands is a huge help. Barber poles can be heavy and awkward to lift, so ask a friend or coworker to help you hoist it into place. Carefully lift the pole and align it with the mounting bracket. Most models will either slide onto the bracket or attach with a set of screws or bolts. Follow the specific instructions included with your barber pole, as the exact attachment method can vary. Secure the pole to the bracket using the provided hardware, making sure everything feels snug and properly seated.
Step 5: Check That It’s Level and Stable
You’re almost there. For the final check, place your level on top of the barber pole to make sure it’s hanging straight. If it’s slightly off, you may be able to loosen the mounting screws, make a small adjustment, and retighten them. Once you’re happy with the position, give the pole a gentle but firm tug to test its stability. It should feel completely solid and secure against the wall. Making sure your installation is stable is the most important safety check you can do. Once you’re confident it’s not going anywhere, you can move on to the wiring.
A Guide to Safely Wiring Your Barber Pole
Wiring your barber pole might seem like the most intimidating part of the installation, but it’s completely manageable when you take it one step at a time. This is one area where you absolutely cannot cut corners. Safety is everything when it comes to electrical work. If you feel unsure at any point, please stop and call a licensed electrician. It’s always better to be safe and get a professional opinion than to risk a fire or electrical hazard in your shop. This guide will walk you through the basic steps, but remember that your specific pole’s instructions are the ultimate authority. Let’s get this classic symbol of your trade lit up and spinning safely.
Safety First: What to Do Before You Start
Before you touch a single wire, your first and most important step is to go to your breaker box and turn off the power to the area where you’ll be working. You can use a voltage tester to confirm there is no active current. Once the power is off, take a moment to review the manufacturer’s instructions that came with your pole. It’s also a good idea to do a preliminary check to make sure all technical aspects and connections look secure right out of the box. This simple prep work sets you up for a smooth and, most importantly, safe installation process.
What Do the Wire Colors Mean?
When you look at the wiring, you’ll see a few different colors. Understanding what each one does is key to getting everything connected correctly. Most barber poles use a standard color code for their wiring. Your pole likely has four wires: a white one, a red one, a black one, and a green one. The white wire is your neutral wire. The red wire typically powers the motor that makes the pole spin. The black wire provides power to the light. Finally, the green wire is the ground, which is a critical safety feature. Knowing these standard wire colors helps you match everything up correctly.
Connect the Neutral, Motor, Light, and Ground Wires
Now it’s time to make the connections. You’ll be connecting the wires from your barber pole to the corresponding wires coming from your building’s power source. Match them color for color: white to white (neutral), red to the motor’s power wire, black to the light’s power wire, and green to green (ground). Your kit should include wire nuts, which are small plastic caps used to twist the ends of the wires together securely. The goal is to secure the two wires from the pole to the wires from the motor and power source, ensuring a tight and safe connection for each pair.
Do You Need a Dedicated Circuit?
A barber pole’s motor and light draw a continuous electrical current, so you need to make sure your shop’s wiring can handle it. In many cases, especially in older buildings, it’s wise to run your barber pole on a dedicated circuit. This prevents it from overloading a circuit that’s already powering other equipment like clippers, blow dryers, and lights. An electrician can help you determine if a new circuit is needed and can follow the best practices for cable installation. This protects your electrical system and ensures your pole operates safely without tripping breakers.
Perform Final Safety Checks
Once all the wires are connected, don’t rush to flip the power back on. Take a few minutes to perform a final safety inspection. Gently tug on each wire to ensure it’s firmly secured inside its wire nut. Check that no copper is exposed and that all connections are clean and tight. This final check is your last line of defense against potential electrical issues. After you’ve confirmed everything is secure, you can restore power at the breaker and test your newly installed barber pole. Seeing it light up and spin for the first time is a truly rewarding moment.
What Makes a Barber Pole Spin?
The endlessly moving stripes of a barber pole are mesmerizing, aren’t they? It’s a classic symbol that instantly tells people what you do, signaling a place for a fresh cut and good conversation. But have you ever wondered what’s actually happening inside that cylinder to make it spin? The magic behind the motion is a clever bit of design that creates a compelling optical illusion. It’s not just for looks; that constant movement is designed to catch the eye of potential clients walking or driving by, drawing them right to your door.
Most traditional poles use a simple electric motor to power the spin, which is why the wiring steps we covered earlier are so important. The motor turns an inner cylinder, making the stripes appear to climb or descend endlessly. This classic mechanism is what most people picture when they think of a barber pole. However, not all modern poles actually spin. Some use brilliant LED lights to create the same effect with no moving parts at all, offering a different set of benefits. Understanding the difference between these two types will help you choose the right pole for your shop’s vibe and know what to expect when you get it running.
How the Spinning Mechanism Works
The classic spinning barber pole operates on a simple and ingenious principle. Inside the weatherproof, clear outer casing, there is a separate inner cylinder painted with diagonal stripes. A small electric motor, usually located in the base or top of the unit, connects to this inner cylinder and causes it to rotate.
As the striped cylinder spins, it creates a visual illusion that makes the stripes appear to be moving vertically up or down the pole. It’s a simple trick of the eye, but it’s incredibly effective at grabbing attention. This mechanism has been the standard for decades, and its straightforward design makes it reliable and relatively easy to maintain. The constant, smooth motion is what gives the barber pole its iconic and hypnotic quality.
Set Up a Stationary LED Display
If you love the classic look but want a more modern and low-maintenance option, a stationary LED pole is an excellent alternative. Instead of a motor and a physically rotating cylinder, these poles use rows of LED lights that are programmed to light up in sequence. This creates the same illusion of spinning stripes but with no moving parts.
Many barbers are opting for a stationary LED display because it offers a contemporary aesthetic while preserving the traditional symbol. The main benefits are durability and energy efficiency. With no motor or mechanical pieces to wear out, these poles often have a longer lifespan and require less upkeep. They give you that timeless, eye-catching effect while incorporating modern technology into your shop’s branding.
Common Installation Mistakes (and How to Avoid Them)
Installing your barber pole is an exciting final step, but a few common missteps can cause headaches down the road. Even the most experienced handyperson can overlook a small detail that leads to a big problem. The good news is that these errors are completely avoidable with a little planning. Let’s walk through the most frequent mistakes so you can get your installation right the first time and enjoy your new symbol of the trade without any worries. By paying attention to these key areas, you ensure your pole is not only beautiful but also safe, secure, and effective at bringing in business.
Forgetting to Find a Stud
Your barber pole is heavier than it looks, and drywall alone simply can’t support its weight over time. One of the most critical steps is locating a wall stud to anchor your mounting bracket. When you install a heavy object, securing it to a stud prevents it from pulling out of the wall, which could damage your pole and your shop. Use a stud finder to locate the wooden beam behind the drywall. If you mount the pole directly to drywall or plaster, you risk it falling, which is a safety hazard for you, your staff, and your clients. Taking a few extra minutes to find a stud provides the structural support needed for a secure, long-lasting installation.
Using the Wrong Mounting Hardware
The box your barber pole came in includes mounting hardware, but it might not be the perfect fit for your specific wall type or situation. Don’t be tempted to just make it work. Using the wrong screws or brackets can lead to an unstable installation. For example, if the provided brackets don’t fit quite right, you might need to create your own mounting straps or purchase different fasteners to ensure a secure fit. Always assess your mounting surface, whether it’s brick, wood, or siding, and choose hardware that is designed for that material and can handle the pole’s weight. A quick trip to the hardware store is a small price to pay for peace of mind.
Skipping the Grounding Wire
When it comes to wiring, there are no shortcuts. Your barber pole typically has four wires: a white (neutral) wire, a red (motor) wire, a black (light) wire, and a green (ground) wire. That green wire is your most important safety feature. It is essential to connect the grounding wire to prevent electrical hazards. The ground wire provides a safe path for electricity to travel in case of a short circuit, protecting you from electric shock and reducing the risk of a fire. Skipping this step is a dangerous mistake. Always follow the wiring diagram and ensure every wire, especially the ground, is properly and securely connected.
Ignoring Local Electrical Codes
Before you complete the wiring, it’s vital to understand and follow your area’s rules. Every city and county has specific electrical codes that dictate how electrical work must be done to ensure public safety. Ignoring these regulations can not only create a dangerous situation but can also lead to fines, failed inspections, or even legal trouble if an accident occurs. Make sure all your electrical connections are tight and compliant with local requirements. If you’re not 100% confident in your knowledge of these codes, it is always best to consult with or hire a licensed electrician. They can guarantee your installation is safe, legal, and up to professional standards.
Placing It in a Low-Visibility Spot
Your barber pole is more than just a decoration; it’s a beacon for your business. A common mistake is installing it in a spot where it can’t be easily seen by passersby. Think about the lines of sight from the street, the sidewalk, and nearby roads. Is it blocked by a tree, an awning, or another sign? The whole point of the pole is to attract customers, so visibility is key. Take a walk around your shop’s exterior and find the location with the maximum impact. A well-placed barber pole acts as 24/7 marketing, drawing eyes and letting everyone know where to find a great haircut. Don’t let your investment go unnoticed.
Keep Your Barber Pole Looking Its Best
Your barber pole is more than just a sign; it’s a beacon for your business and a symbol of your craft. Once it’s installed, a little routine care will keep it spinning and shining for years to come. Regular maintenance helps you catch small issues before they become big problems, ensuring your pole remains a bright, welcoming landmark for every client who walks through your door. Think of it as protecting your investment. A well-maintained pole not only looks professional but also functions safely and reliably, saving you from the headache of unexpected repairs. By spending just a few minutes on it every month, you can ensure it continues to represent the quality and care you put into your work.
How to Clean and Inspect Your Pole
Keeping your barber pole looking sharp is simple. At least once every couple of weeks, give the outer cylinder a gentle wipe-down with a soft, dry cloth to get rid of any dust or debris. If you notice tougher grime, you can use a mild cleaner, but always check your manufacturer’s instructions first. While you’re cleaning, take a moment to inspect the pole. Look for any signs of wear, like cracks in the casing or fading colors. It’s also a great time to give the mounting bracket a gentle wiggle to make sure it’s still secure. A quick check of the technical aspects like electrical connections will help you spot any potential issues early on.
Troubleshoot Common Electrical Problems
If your pole’s light flickers or the motor stops spinning, a loose connection is often the culprit. Before you do anything, turn off the power at the circuit breaker. Safety first, always. Most barber poles use a standard four-wire system. The white wire is your neutral, the black wire powers the light, the red wire runs the motor, and the green wire is for the ground. Check that each of these wires is securely fastened with a wire nut. If you recently replaced a part, you may need to reference a wiring diagram to confirm everything is connected correctly. Gently tug on each wire to ensure it’s snug in its connection.
Frequently Asked Questions
What’s the real story behind the red, white, and blue stripes? The colors are a direct link to the days when barbers also performed medical procedures. The red represents blood from the common practice of bloodletting, and the white symbolizes the clean bandages used afterward. The origin of the blue stripe is a bit of a debate; some historians think it represents veins, while others believe it was added in the United States to reflect the colors of the flag.
I’m pretty handy. Do I really need to find a wall stud to hang my pole? Yes, absolutely. This is probably the most important step for a safe installation. Barber poles are surprisingly heavy, and drywall or plaster alone is not strong enough to hold one securely over time. Anchoring the mounting bracket to a stud ensures the pole has the structural support it needs and won’t fall, which could damage your wall, your pole, and potentially injure someone.
The wiring seems complicated. Can I just do it myself? While the process can be straightforward, electrical work is one area where you can’t afford to make a mistake. If you have any hesitation or are unfamiliar with your building’s wiring, I strongly recommend hiring a licensed electrician. They will ensure the installation is done safely, meets all local electrical codes, and won’t create a fire hazard. It’s a small price to pay for peace of mind.
Should I get a classic spinning pole or a modern LED one? This really comes down to your shop’s style and how much maintenance you want to perform. A traditional spinning pole has that classic, hypnotic motion that draws people in, but it has a motor that may eventually need service. A stationary LED pole creates the same illusion of movement with no moving parts, making it a durable, low-maintenance option with a more modern feel.
My pole is installed. How often do I need to clean or inspect it? A little routine care goes a long way. Plan to wipe down the outer casing with a soft cloth every couple of weeks to keep it looking clean and bright. About once a month, it’s a good idea to do a quick inspection. Gently check that the mounting bracket is still firm against the wall and look over the electrical connections to make sure everything is still secure.