
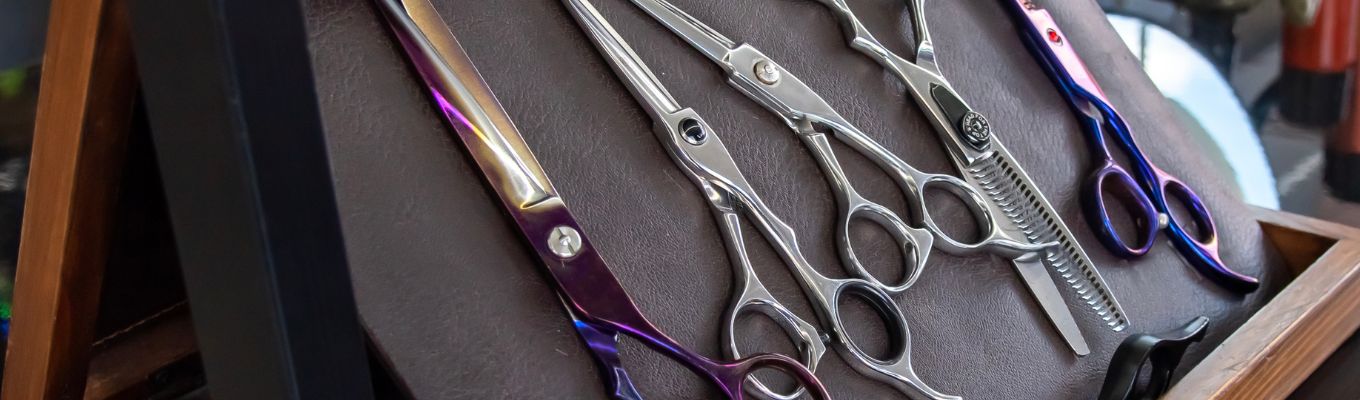
Professional barber shears are precision cutting tools selected around a barber’s technique, hand fit, and daily workload. The right pair should let you control the line, remove weight, or create texture without forcing your wrist, pinching your fingers, or pushing hair out of the blades. Choosing well means matching construction and fit to the way you actually cut, then buying from a source that can support sharpening and maintenance after the sale.
Call The Barber Company at (702) 900-9972 for help choosing professional barber shears.
A shear can feel impressive in a product photo and still be wrong for your hand. Length, edge geometry, handle shape, finger-ring position, weight distribution, and tension all change the way the tool behaves. A barber who mostly performs scissor-over-comb work may want a different feel from a barber who uses point cutting, slide cutting, or detailed shear work around the ears. The goal is not to find a universally best shear. The goal is to find a dependable shear whose design supports your method.
This guide breaks that decision into practical steps. It covers steel and edge construction, barber shear size, balance, handles, tension, brand evaluation, daily care, and professional sharpening. It is written for working barbers, shop owners, students building a kit, mobile barbers, and retail customers who want professional-grade equipment without needing a professional license. Use the framework to compare tools in person or to narrow an online purchase before you spend.
What Should You Look for in Professional Barber Shears?
Look for a shear that matches your cutting method, hand size, preferred length, and maintenance habits. Start with a clean edge, smooth closing action, stable tension, and a handle that keeps your thumb and fingers relaxed. Then assess steel, balance, and service support instead of choosing only by finish, brand name, or marketing language.
The best buying process starts with the work you need the shears to perform. Write down whether you need a primary cutting shear, a texturizing shear, a backup, or a specialty tool. A primary cutting shear should handle the techniques you use most often. A specialty shear should solve a specific problem, such as removing weight or refining a perimeter, rather than duplicate a tool already in your case.
Define the job before comparing brands
Start with your service mix. If you perform classic scissor cuts, longer shear-over-comb work, and controlled perimeter shaping, a straight cutting shear with a predictable line may be the foundation. If your work is built around short textured cuts, you may value a blade that enters and exits hair cleanly during point cutting. If you mainly detail beards, fringe, and around-the-ear work, maneuverability and visual control can matter more than maximum reach.
Do not confuse a curved shear with a standard cutting shear. Curved designs may be useful for certain contours and specialty techniques, but they should not replace the tool you rely on for everyday straight-line control unless that fits your method. Likewise, a thinning or blending shear has a different purpose from a solid blade shear. Teeth count, tooth shape, and the amount of hair removed affect the result, so choose a texturizing tool for a defined task rather than as an all-purpose purchase.
Use a hands-on test when possible
When you can handle a shear, open and close it slowly without cutting hair. The movement should feel controlled rather than gritty, loose, or abruptly tight. Check that the thumb can move without dragging the entire hand. Confirm that the finger rest does not force an awkward angle. Look at the blades from the side while closed. They should meet consistently through the cutting area, without an obvious gap or harsh contact point.
Test the tool with the thumb rather than squeezing with the whole hand. Many new users instinctively close their fingers and wrist together, which makes a shear feel heavier and hides poor fit. A relaxed thumb action gives you a better sense of the tension, balance, and handle geometry. If you are shopping online, ask for the exact length, handle style, material details, and return or service policy before ordering.
Separate useful specifications from sales language
Specifications are useful when they describe a measurable design feature, such as blade length, overall length, handle configuration, or steel designation. They are less useful when they promise that a shear is perfect for every barber or never needs adjustment. Treat statements about sharpness, comfort, or durability as prompts for questions. Ask how the shear should be maintained, where it can be serviced, and which cutting techniques the manufacturer recommends.
Brand reputation matters because consistent manufacturing and service can reduce risk, but reputation should not replace fit. A highly respected shear can still be uncomfortable in your hand. The Barber Company can help professionals compare available options, including professional Utsumi shears for barbering, and discuss whether the design suits the techniques you perform most often.

Steel and Edge Geometry Determine Cutting Behavior
Steel influences how a shear can be finished and maintained, while edge geometry controls how the blades engage hair. Japanese and German steel traditions each include many grades and designs, so neither label guarantees a better tool. Evaluate the actual edge, closing action, hardness claims, corrosion care, and sharpening support as a complete system.
How steel affects a professional shear
Steel is the working material behind the blade, pivot area, and handle structure. Its composition and treatment influence how an edge can be formed, how the blade responds to sharpening, and how the tool tolerates daily cleaning and moisture. The practical takeaway is simple: a steel label is a starting point, not the entire buying decision.
Japanese steel is often associated with refined professional shears and precise edge finishing, while German steel is widely associated with established cutlery manufacturing. Those are broad manufacturing traditions, not a ranking system. Within either category, tools can differ in edge profile, finishing quality, balance, handle design, and intended use. Compare the specific shear and its care requirements rather than assuming the country name answers every question.
Ask whether the manufacturer publishes a steel designation and care guidance. Be cautious with unsupported hardness numbers or claims that a particular alloy is indestructible. A harder edge may feel precise, but it still needs appropriate handling and a qualified sharpener. A shear that is easy to service and comfortable to use can be a better working investment than one selected from a specification sheet alone.
Convex, semi-convex, and beveled edges
A convex edge curves smoothly toward the cutting line and is commonly associated with a clean, gliding feel in techniques such as slide cutting and point cutting. A semi-convex edge may balance a smooth cut with a design that is less specialized. A beveled edge has a more defined meeting surface and may suit different cutting preferences and maintenance approaches. The labels describe geometry, not a promise of universal superiority.
Edge geometry must match the technique. A shear that glides well for one barber can feel too aggressive, too delicate, or too difficult to control for another. If you use the blades against a comb, perform dry detailing, or work close to the skin, the way the edge enters hair matters. Ask the seller or manufacturer what techniques the shear is built to support, and do not use a tool outside its intended method simply because it is sharp.
Why blade alignment matters
Two blades must meet in a controlled way for the shear to cut instead of folding, pushing, or snagging hair. Alignment includes the relationship between the pivot, blade faces, and cutting edges. If a shear is dropped or adjusted incorrectly, the blades can become misaligned even when the edge still looks sharp. A professional sharpening service can inspect alignment and tension as part of a proper service rather than removing material without diagnosing the problem.
Keep the blades clean while evaluating them. Hair product residue can make a smooth shear feel rough, and oil in the wrong area can attract debris. A clean, lightly maintained pivot lets you judge the actual action of the tool. If the shear makes a harsh clicking sound, leaves a visible nick, or closes unevenly, stop using it until it has been checked.
Choosing a primary cutting edge
For a primary shear, prioritize repeatable control over novelty. You should be able to close the blades with a measured thumb movement and predict the amount of hair being removed. The edge should complement your dominant techniques, whether that means a crisp line, a controlled point cut, or a smooth slide cut. Keep specialty tools separate from this decision so the main shear remains reliable and familiar.
Which Barber Shear Size Fits Your Cutting Technique?
Barber shear size is a working measurement, not a skill level. Many professionals begin by comparing 5.5-inch and 6-inch shears because those lengths balance control and reach for common barbering work. Shorter shears can feel nimble for detail, while longer shears can cover more length and support shear-over-comb. Your hand, technique, and service mix should decide.
5.5-inch shears for control and detail
A 5.5-inch shear often feels compact and responsive. It can be comfortable for detail work, controlled point cutting, fringe, around-the-ear areas, and barbers who prefer a shorter opening. Shorter does not mean less professional. It simply changes leverage, reach, and how much blade is available during a stroke.
Choose a 5.5-inch model when you value close visual control or when a longer blade makes your hand feel crowded. It may also suit a barber with smaller hands, although hand size alone should not make the decision. If you perform long, continuous strokes or broad shear-over-comb work, test whether the shorter length requires extra passes. More passes can affect your rhythm even when the shear itself feels excellent.
6-inch shears for reach and shear-over-comb work
A 6-inch shear gives you more working length and can make longer sections, perimeter work, and shear-over-comb techniques feel efficient. The extra blade may help a barber cover more area with fewer openings and closings. It can also feel more stable for a barber who likes a longer, deliberate stroke.
Longer shears require enough space and control to avoid taking more hair than intended. If the blade feels difficult to place around a tight contour, the length may not suit that service. A 6-inch shear is not automatically better for thick hair, long hair, or experienced barbers. It is a different control system. Test the opening, closing, and hand position in the techniques you actually use.
How to measure and compare length
Confirm how the manufacturer measures the stated length. Some listings emphasize blade length, while others refer to the full shear length. Compare like with like and ask for a diagram or measurement if the listing is unclear. Also check whether the finger rest and handle design add noticeable length behind the pivot. Small differences can change how the shear sits in your hand.
When comparing sizes, make the same motion with both tools. Hold the shear in your working position, rest the ring and pinky naturally, and open the blade to the range you use in a cut. Pay attention to whether the tip feels easy to place and whether the pivot stays stable. If you cannot test in person, describe your primary technique to a knowledgeable supplier before selecting a size.
Do not ignore texturizing shear size
Texturizing shears are sized and designed differently from solid blade shears. The number and shape of the teeth influence how much hair is removed and how visible the result can be. A texturizing shear that removes too much for your technique can create correction work, while one that removes too little may slow down a service. Choose the tool around the finish you want, not only the size printed on the handle.
Balance, Handle Design, and Tension Affect Daily Control
Balance and handle design determine how much force your hand uses over a full day. Offset handles can reduce wrist extension for some barbers, while classic handles may provide a familiar straight alignment. Tension should keep the blades engaged without making the thumb fight the tool. Comfort is a functional requirement, not a cosmetic preference.
Classic and offset handles
A classic handle places the finger rings in a more traditional alignment with the blades. Some barbers prefer that direct feel because it makes the tool predictable and easy to rotate during established techniques. An offset handle drops the thumb ring relative to the finger ring. That shape may allow a more relaxed thumb position for some users, especially during repeated opening and closing.
Neither handle is correct for every hand. An offset design can still feel wrong if the finger rings are too small, the thumb ring is too far away, or the finger rest changes your wrist angle. Try the exact handle, not only a similar model. If you buy online, check ring dimensions, removable inserts, and whether the finger rest is fixed or adjustable.
Finger rings, inserts, and finger rest
Finger rings should hold the fingers securely without compressing them. Removable inserts can help fine-tune fit, but they should not be used to hide a fundamentally wrong handle size. Place the thumb in the thumb ring and allow the ring finger to support the lower handle. The index and middle fingers should guide the tool, not squeeze it closed.
A finger rest gives the pinky a reference point and can support a stable hand position. Some barbers remove it for a more mobile grip, while others rely on it for consistency. If you use one, make sure it does not push the hand into a bent wrist. The goal is a repeatable position that lets the thumb move independently while the wrist remains neutral.
What a correct tension setting feels like
Correct tension varies with the shear design, edge, and technique, but the basic test is consistent. Hold the shear in working position and open the blades modestly. Release the moving blade and observe whether it closes smoothly under its own weight or remains controlled according to the manufacturer guidance. Do not force a blade test on an unfamiliar tool, and never tighten the knob until the shear feels stiff.
Tension that is too loose can let the blades fold hair, push the section, or contact in an uncontrolled way. Tension that is too tight can increase thumb effort and cause unnecessary wear. Make small adjustments, use the intended tension system, and test on clean hair when appropriate. If the action changes suddenly, the shear has been dropped, or the knob no longer holds, have the tool evaluated instead of continuing to tighten it.
Balance matters more than a light number
A light shear is not automatically a comfortable shear. Balance describes how the weight is distributed around the pivot and handle. A tool can feel stable even if it is not the lightest option, while a very light tool can feel tip-heavy or nervous. Compare how the shear sits when your hand is relaxed, not only what it weighs in a listing.
Barbers who work long days should pay attention to repeated motion. A small mismatch in handle position may become noticeable across many appointments. If you feel thumb pressure, wrist bending, or a need to grip harder, stop and reassess the fit. The right tool should make your technique easier to repeat, not require you to adapt your body to the tool.

Why Utsumi Shears Are a Strong Option for Professional Barbers
Utsumi shears are a strong option when you want a specialized professional tool, a defined cutting feel, and access to a collection built around barbering use. The right Utsumi model still depends on length, edge, handle, and technique. Treat the brand as a qualified option to compare, not as a substitute for hands-on fit and service guidance.
Match the model to your method
Start with the job, then compare the Utsumi model that fits it. A solid blade shear may be appropriate for primary cutting and controlled detail, while another design may serve a specialty purpose. Look at blade length, handle shape, finger rest, and edge profile together. If you are unsure, tell the supplier whether you use scissor-over-comb, point cutting, slide cutting, dry detailing, or beard work.
The value of a professional collection is the ability to compare tools with a clear purpose. Avoid buying a model only because its finish photographs well or because another barber uses it. Different hands and techniques can produce different results with the same shear. Build a small, coherent kit in which each tool has a job and the primary shear remains the one you know best.
Ask about service before you buy
A professional shear is a working asset, so service access should be part of the purchase decision. Ask who can inspect the edge, pivot, alignment, and tension when the tool needs attention. Confirm whether the maker has care instructions and whether a local service provider is familiar with the edge style. A beautiful shear that cannot be serviced appropriately is a risky long-term choice.
The Barber Company offers local guidance for professionals and retail customers, including a Las Vegas shear sharpening service guide. Use the service information to understand what to bring in, what condition the tool should be in, and why a qualified inspection is preferable to an improvised repair. If your shears are not cutting cleanly, describe the symptom rather than assuming the edge alone is the problem.
Choose authorized, practical support
A good supplier should help you connect the tool to your work. That means answering questions about size and technique, explaining care without inventing guarantees, and providing a practical path for maintenance. It also means being honest when a model is not the right fit. The Barber Company serves professional barbers and the general public, so you can ask for equipment guidance without needing a professional license.
For shop owners and teams, consistency matters. If several barbers are buying shears, document each tool’s intended use and care routine. A primary cutting shear, a texturizing shear, and a specialty shear should not be stored or adjusted as if they were identical. Clear labeling and regular inspection help prevent one tool from being used for a technique that can damage its edge.
How Should You Maintain and Sharpen Barber Shears?
Maintain barber shears by removing hair and residue, drying the blades, storing them closed in protection, and keeping the pivot lubricated according to the maker’s guidance. Sharpen when the cutting behavior changes, not on an arbitrary calendar. A qualified sharpener should inspect alignment, tension, and edge condition before removing material.
Clean after each working day
Wipe the blades and handle with a clean, suitable cloth after use. Remove hair, product residue, and moisture from the pivot and cutting surfaces. Follow the manufacturer’s sanitation guidance, because harsh chemicals or incorrect soaking can affect finishes, lubricants, and moving parts. Do not leave a shear wet in a closed case. Dry it before storage and keep the blades closed.
Use oil sparingly and place it where the manufacturer recommends, usually around the pivot rather than across the entire edge. Open and close the shear carefully to distribute the lubricant, then wipe away excess. Too much oil attracts hair and dust. A clean tool gives you better feedback and reduces the chance that residue will be mistaken for a dull edge.
Store shears to protect the edge
Protect the edge from contact with combs, clips, loose tools, and the bottom of a crowded case. A dedicated pouch or shear case reduces accidental impact. Do not toss professional shears into a drawer or leave them open on a station. If a shear falls, stop using it and inspect the blades, pivot, and handle before returning it to service.
Keep the tool away from unnecessary humidity and heat. A barber station can expose equipment to water, disinfectant, hair, and product throughout a day. Simple storage habits protect the investment: wipe first, close the blades, secure the tool, and keep it separate from items that can strike or twist it.
Recognize the signs of dullness
Dullness does not always feel like a completely blunt blade. You may notice hair folding between the blades, a need to squeeze harder, pulling at the section, a rough closing sound, or a finish that requires repeated passes. If the shear worked cleanly before and its behavior changes despite proper cleaning, treat that change as a service signal.
Before requesting sharpening, rule out simple causes. Check whether product residue is on the edge, whether the pivot is dry, and whether the tension has changed. Inspect for a nick or damage after any drop. If the symptom persists, do not try to correct it with a household sharpener, abrasive stone, or unapproved adjustment. Those methods can change the edge geometry and make professional restoration harder.
When to use professional sharpening
Use professional sharpening when the shear pulls, pushes, folds hair, closes unevenly, or no longer produces the finish you expect after cleaning and correct basic adjustment. Professional service should evaluate the whole tool, including edge condition, blade alignment, pivot movement, and tension. The correct service may be sharpening, adjustment, repair, or a recommendation to retire a damaged shear.
Do not wait for severe damage if the cutting behavior is changing. At the same time, do not request sharpening simply because a calendar reminder says it is time. Usage, technique, cleaning, storage, and the individual shear all affect service needs. A qualified provider can explain the condition of the edge and what maintenance is appropriate.
Transporting shears between shops or classes
Use a closed protective case when carrying shears to a shop, class, competition, or service appointment. Secure each pair so the blades cannot strike another tool. If a shear is being sent for service, clean and dry it first, then describe the problem accurately. Notes such as pulling on wet hair, pushing during point cutting, or clicking at the pivot help the sharpener diagnose the tool.
Need help choosing or maintaining your shears? Call The Barber Company at (702) 900-9972.
Frequently Asked Questions
Professional shear selection becomes easier when you separate size, steel, edge, and maintenance questions. The answers below address common decisions without treating one design as universal. Use them as a starting point, then compare the exact shear in your hand and confirm the care requirements before you make it part of your working kit.
Are 5.5-inch or 6-inch shears better for barbering?
Neither size is automatically better. A 5.5-inch shear can provide close control for detail and point cutting, while a 6-inch shear can provide reach for longer strokes and shear-over-comb work. Choose the length that lets you place the blade accurately, maintain a relaxed grip, and complete your most common techniques efficiently.
Is Japanese steel automatically better for barber shears?
No. Japanese steel can be an excellent choice, but the label alone does not determine edge quality, balance, handle fit, or serviceability. Compare the specific steel information, edge geometry, finishing, care guidance, and sharpening support. A well-fitted shear from a different manufacturing tradition can outperform a poorly fitted tool with a more prestigious label.
How do I know when my shears need professional sharpening?
Signs include pulling, pushing, folding hair, rough closing, extra hand pressure, or a finish that requires repeated passes after cleaning and correct tension. A drop or visible nick also calls for inspection. Ask a qualified sharpener to check the edge, alignment, pivot, and tension rather than assuming that sharpening alone will solve every problem.
Build a shear kit that supports your work
The most useful shear kit is not the largest one. It is the set you can identify, maintain, and use with confidence. Start with a primary cutting shear that matches your dominant technique. Add a texturizing or specialty tool only when it solves a recurring service need. Keep notes on each shear’s size, handle, edge, and preferred maintenance method.
Reassess fit when your work changes. A barber who moves from mostly fades into longer scissor cuts may value more reach. A barber who begins detailed beard and texture services may want more maneuverability. Your hands, schedule, and technique are the correct reference points. Do not let a trend, a product photo, or another barber’s setup decide for you.
Shop professional Utsumi shears through The Barber Company.
Whether you are replacing a worn primary shear or building a first professional kit, compare the full working system: construction, edge, length, handle, balance, tension, and service. The right choice should feel controlled in your hand today and remain supportable when it needs care. The Barber Company can help you choose equipment, discuss local sharpening, and find practical tools for professional barbering and home grooming.
About The Barber Company
Shop barber supplies at The Barber Company for professional tools, grooming products, and equipment guidance in Las Vegas. The store supports working barbers, independent shops, barber students, mobile professionals, and retail customers seeking professional-grade products.
Follow The Barber Company on Instagram at @barbercompanylv for store updates, product information, and barber-focused content.
The Barber Company
4700 Meadows Ln #110
Las Vegas, NV 89107
(702) 900-9972
For questions about professional barber shears, product availability, wholesale needs, local delivery, or technical maintenance, call the store at (702) 900-9972 or visit The Barber Company in Las Vegas.